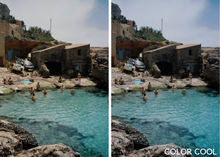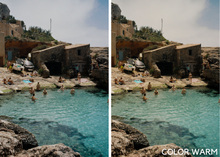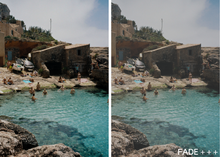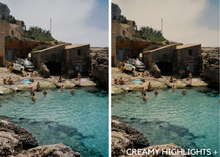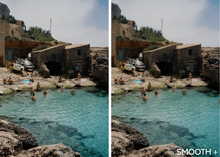
YOUR SOLUTION TO GET THE LOOK YOU WANT. THESE ARE STACKABLE FILTERS, SO YOU CAN APPLY THEM ON ANY PREVIOUS EDITS FOR AN ADDITIONAL POP. OR JUST USE THEM ALONE FOR MINIMAL ADJUSTMENTS. ONE CLICK GOES A LONG WAY.
CRAFTED FOR ADOBE LIGHTROOM DESKTOP. PERFECT FOR ALL IMAGES, WORKS ON EVERYTHING. 21 TOTAL PRESETS.
-
CREAMY HIGHLIGHTS
-
CREAMY HIGHLIGHTS +
-
GRAIN - LIGHT
-
GRAIN - MEDIUM
-
GRAIN - HEAVY
-
FADE +
-
FADE ++
-
FADE +++
-
COLOR WARM
-
COLOR COOL
-
FADE HIGHLIGHTS
-
FADE SHADOWS
-
BLUES -
-
BLUES +
-
GREENS +
-
ORANGE SKIN -
-
ORANGE SKIN +
-
SATURATION -
-
SATURATION +
-
SMOOTH +
-
SMOOTH ++
HOW TO INSTALL ON LIGHTROOM DESKTOP:
Make sure to download Adobe Lightroom CLASSIC. This is preferred version. Sign up for a subscription (monthly payments) if you haven’t already.
-
Open Lightroom on your computer & click ‘Lightroom Classic’ on the top left.
-
Go to ‘Preferences’
-
Go to ‘Presets’ tab (second from the left)
-
Click ‘Show All Other Lightroom Presets’
-
Open the ‘CameraRaw’ folder
-
Click ‘Settings”
-
Drag the presets folder into the ‘Settings’ folder
-
Restart Lightroom and go into the ‘Develop’ tab, which will load the presets on the left side
-
Edit away!
Please keep in mind that these presets might not achieve the exact look you’re going for immediately. Additional adjustments may be needed. After applying preset— try adjusting brightness, contrast, saturation, etc. I personally adjust my photos after applying a base preset because I shoot different types of lighting.


