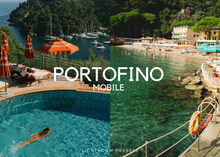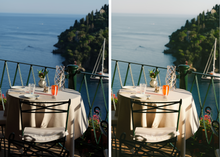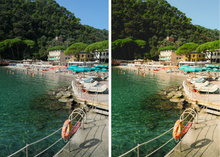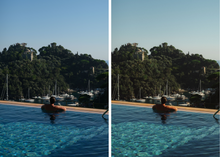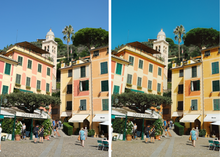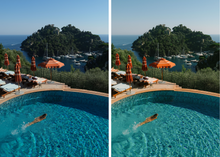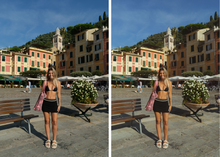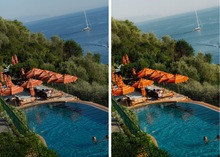
CREAMY ITALIAN COLORS. DREAMY TONES & LA DOLCE VITA.
CRAFTED FOR ADOBE LIGHTROOM MOBILE.
PERFECT FOR TRAVEL LANDSCAPES & LIFESTYLE VACATIONS.
-
PORTOFINO 01
-
PORTOFINO 02
-
PORTOFINO 03
-
PORTOFINO 04
-
PORTOFINO 05
-
PORTOFINO 06
-
PORTOFINO 07
HOW TO INSTALL MOBILE:
*DOWNLOAD YOUR PRESETS ON A COMPUTER*
Once you purchase, you will receive an email that contains a link that will last for 24 hours.
Before you begin - download the mobile Lightroom CC app from the App Store. Sign up for an Adobe account if you don’t have one already, this is free on mobile.
-
Click on the link to download the presets. There should be DNG files inside the folder.
-
Download the zip file onto your computer. Open the folder, select all the files & send all the preset files to your phone, using airdrop or email if you don’t have an iPhone.
-
When you open them on your phone, the files might come up either grey, white or black. Don’t worry that is normal.
-
Once the files are on the phone, go to the Lightroom App. Inside, create a new album, labeling it CARSSUN. You can do this by going to the top right and clicking the “+”
-
Next, click on the 3 dots on the right side next to the album, and click ‘add photos’ After added, the photos should come up and you should now be able to see the title of each preset. (If not, go into ‘view options’ and turn on ‘photo info’)
-
Go to the presets folder & click on the first preset, click the 3 dots in the top right corner and then click ‘create preset’. Name it accordingly, make sure all the boxes are checked & then click ‘save’ in the top right. Repeat this on each preset.
-
Once you’re done, you can begin to edit your photos by uploading your own image and sliding all the way to the right on the tool bar and select “Presets”.
Please keep in mind that these presets might not achieve the exact look you’re going for immediately. Additional adjustments may be needed. After applying preset— try adjusting brightness, contrast, saturation, etc. I personally adjust my photos after applying a base preset because I shoot different types of lighting.


